Friday, June 9, 2023

Early Bustle 6-piece ensemble after Janet Arnold

Since Lara made me the Early Bustle polonaise, and since I'm building the undergarments (and the skirt) for it, it seems like it would be a shame to only have one gown that I can wear with it. (I know, right?) However, that skirt and bustle are still in process, and I'm not starting on a new project until I finish something, so I'm resolved to hold off on a second 1870s project. For now. 

However, I can't not ruminate and plan, so here is the current thinking. 

This all started because a friend gifted me with a silk queen duvet cover and shams of striped two-tone gray or silver dupioni. It seems to cry out as Early Bustle, especially since this striped pattern appears in Janet Arnold, taken from the gray and blue striped original. 

The original ensemble is silk and cotton, with blue ruchings and fringe trim. It's a 6-piece ensemble consisting of skirt and overskirt, basque, two bodices, and a gilet. One bodice is a day bodice, and the gilet is a detachable filler for the deep square neckline. The other bodice is an evening bodice. 

This is an elegant solution to issues of economy in both the cost of fabric and space, and it meets my interest in the "capsule" wardrobe concept, in which several coordinating pieces can be combined in an assortment of ways to achieve a variety of looks and uses. 


The original evening gown bodice features a low wide neckline and short puff sleeves, while the day bodice has long sleeves with flared cuffs at the elbow and wrist. The square neckline of the day bodice was popular, but the attachment of a removable gillet creates a more modest presentation. 

The basque is removable, and I can imagine a couple of basques created for this ensemble with different shapes and decoration to switch up the presentation. 

An additional feature of the evening bodice is a net or beaded lace insert to draw the neckline in, adjusting it to the desired shoulder placement. 

I'm also attracted to this original gown because of the liberal use of buttons - I'm kind of a button fiend, and my "trademark" is using non-matching buttons of a similar size and color on all my Neo-Victorian creations. 

The other things that I especially love about this gown are the bias-cut ruffles, and the yards upon yards of bubble gathered ruchings. I'm not sure how I feel about the fringe; my personal taste runs to lace. We'll see about that. 

The ensemble would take a woman from day into evening with a simple change of the bodice. During the day, the ensemble would be worn with long sleeves and the removable gillet and be termed a "day" dress; in the evening, the lower sleeve and gillet would  be removed for dinner or a social event; the entire bodice changed to the low neckline and short sleeves to convert the ensemble into a ball gown. 

Several dressmakers [1] [2] have recreated the pattern, so I've been looking at their dress diaries to see how they addressed Arnold's pattern. I'll admit it; I don't have a ton of confidence drafting patterns from Arnold. They're complex. So much stuff. Parts and parts. 

I feel more comfortable starting with a known quantity, so I'm going to buy Truly Victorian patterns and start with making adjustments from them. This should work well, since most dress pieces followed a set of standard forms; skirts were similar shapes, and bodices all are basically about the same. The patterns are as follows:

The basque and gillet patterns will have to be drafted from Arnold, but they're straightforward and I can handle that. 

All those TV patterns together are 12.5 yards of fabric. There are not 12.5 yards in a duvet cover, so I need a contrasting color. And since the duvet cover is silk, I really feel strongly that the rest of the ensemble needs to be silk too. I can't help it. It just needs to be. 

So I'm looking for some contrasting plain silk taffeta. (Dupioni is okay - and cheaper - but it really wasn't used much for clothing in the Victorian era.) I prefer aubergine, but burgundy is good too. The plan is to make the bodices of the striped silk, and trimmed in aubergine/burgundy silk, and then construct the skirt out of the contrasting silk, with the ruffles in striped silk. The best price I can find on burgundy taffeta means that I still need to invest $135 into fabric. 

I'll keep looking. 

The dress diary will come in the fall of 2023, when I have time to actually start on this project. I hope to have it done before Costume College in March 2024.


[1] https://thedreamstress.com/portfolio-1871-pink-extravaganza-afternoon-ensemble/

[2] https://teainateacup.wordpress.com/2015/05/06/making-an-early-1870s-gown-skirts/

Friday, April 21, 2023

Dress Diary: When in doubt, add another petticoat (part 2 - engineering)

And here we get to the engineering of a petticoat. 

To review, I'm making the first of about 3 walking length petticoats, based on an exemplar from The Delineator magazine from 1896. They will be made of premium bleached muslin, with faux silk absinthe green ruching. 

The first petticoat body is cut of seven gores, as my skirts are seven gores. It will have 2 tiers of applied ruffles, and an adjustable waistband. The petticoat is designed to be convertible to a ballgown length, by applying buttonholes to attach a ruffled and ruched train. 

Before I found the exemplar that I liked the best, I had already cut out the seven gore body of the petticoat. As a matter of fact, I'd flat felled the seams and hemmed the body. I'd cut it somewhat shorter than the skirt of course, since being a New Woman, I didn't want my petticoat in the dust and mud. 

I wasn't planning on two tiers of ruffles. 

But here we are, and so I didn't feel too bad about cutting off that hem. 

I'd also hemmed 6+ yards of 8" ruffle, but again, two tiers, so I'll have to re-engineer. 

The ruffle tiers

Ruffles are long, tedious, but basically mindless. Tear the longset strips of yardage that you can, flat-fell seams between lengths, make sure that you have a full bobbin, and hemhemhemhem... 

I made a new length of ruffles with about 7 yards of 5" muslin which will yield a 4" tier after finishing. My petticoat body hem conveniently measures at 4 yards, which typically requires about 6 yards of ruffles. I'll be honest - I didn't feel like cutting off a yard of length, and so I went with it. The ruffle length was hemmed with a narrow rolled hem on one side, and with a gathering stitch on the other. 

The ruffle was then gathered to the hemline, and placed about 3/8" from the edge, right sides together. (I might have placed a piece of lace between the body and the ruffle for extra, but I didn't on the first one. Maybe the next one.) Turns out that 1:1.5 doesn't seem like an adequate hem to ruffle ratio for this application, so the extra yard was a good thing. 

The ruffle is stitched to the body hemline and then the extra length is folded over and stitched down to finish the inside seam.

The bottom tier with ruching rows pinned on
The bottom tier is 9.5" wide and 14 yards long, which is 2x of the top tier. Changed my mind to use green organza ribbon for the ruches, at 28 yards long gathered 2x to the ruffle. Each length of ruching ribbon was pinned at 1 yard intervals, and then gathered within those intervals to keep the fullness consistent across the entire ruffle tier. The top row of ribbon ruching is placed at 4" from the hem of the tier, and the bottom row is at 2" from the hem. Finally, the ruches are stitched to the ruffle tier. 

The ruffle volume increases dramatically with all the ruches attached. 

The bottom tier is then stitched together in an enormous circle, and the back seam is aligned with the back seam of the petticoat. To gather the bottom ruffle tier, I pinned the bottom tier - finished top edge to the right side of the top tier - at 12" intervals to 6" intervals on the top tier, pulled the gathering threads and then pinned the gathers evenly in the 6" spaces. The bottom tier is then stitched onto the top tier. 

This manual method of gathering is super labor-intensive, and depends on doubling the tiers each layer to get a good amount of support for the skirt. I have no idea how many hours I've spent on this one petticoat, but it's been at least a few full days of work. I will be using a ruffler attachment on my machine for the next petticoat, and hoping that I can get adequate volume. 

The waist

There is actually no "band" on the model from The Delineator; it's a bias-cut facing. A 3" wide bias band is stitched to the right side of the waistline with a 5/8" seam allowance, the ends finished in a narrow rolled hem. The waist tapes were stitched below this seam to the inside of the vertical seams between the second and third gores - but one of them pulled out on the first wearing! So I pulled out the other, and ran a new twill tape through the entire waist facing - which was turned and pressed to the inside, and then stitched down. 

The REST of the Story

The Neverending petticoat persists. 

After finishing it, I decided that it was a tripping hazard and needed to be taken up 2". 

Did I do the easy thing, and take off the ruffles to shorten the body? Oh, no! I reasoned that while I'm currently wearing flats, I might be able to manage heels one day and so didn't want to actually shorten the petticoat. I took a one inch tuck just above the top tier and then folded in the bottom hem for another inch. The length is perfect, and I'll be using that length for petticoat #2. 

In addition, the twill tape on hand at JoAnn's is too wide and too stiff for the waist tie. I've ordered a more suitable length from Amazon and will be replacing the replacement. 

In short, this was really a wearable mockup, and I've learned a lot for the next 5 petticoats that I need. Make it shorter, how to finish the interior seams, and I need to learn to use a ruffler attachement for my machine. I love the bias-faced waistband, and will continue to use that. The adjustability is perfect for my changing size. And the floof really does make the 1890's skirt silhouette. 


Thursday, January 26, 2023

Dress Diary: The Absinthe Ballgown project

I've wanted a Belle Epoque "Absinthe" ball gown for years. 

Literally. Years. 

To that end, I've been collecting green and gold luxe fabrics. For years. My best find ever was the bolts of two coordinating silks that I found at the much beloved - but lost - Colorado Fabrics. One bolt is deep forest green and the other is the same green striped with taupe. Also collected have been embroidered faux silks, a couple of saris, some upholstery fabric for facings - well, an entire box of bits, bobs, and findings. 

The prospect of having a gorgeous gown is doing wonders for my mental state - I'm excited about it in a way that I haven't been excited about sewing for a very long time. (Maybe it's because of the Anaheim debacle, but that's a tale for another day.) One of the reasons that I've been interested in organizing another Victorian Ball is so we can have an elegant evening in beautiful attire. 

And now the opportunity presents itself. Victorian Society of Colorado sponsors several balls each year, and one is approaching in just over 2 weeks. My friend Lara has constructed my corset, and has generously agreed to help with the fitting and sewing on this project. It's going to be a tight timeline, but we're spending next weekend on it, so I anticipate having a great deal of the structural work done in the next few days. That petticoat project is one initial piece, and I plan to have at least one done before the weekend work sessions; the corset and chemise are ready to go and the bloomers need some alterations. 

I expect to have the next week plus to do embellishment on the gown; draping lace and making ribbon roses. I do wish that I had a dress form for this. 

The design

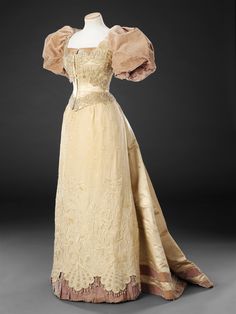
The patterns that we are using are Truly Victorian TV 490, the 1892 Ballgown bodice, and TV 292, the 1893 Bell Skirt, which is the style that many Worth gowns employed. We'll be using the pouf sleeve as in the taupe gown below, to which will be added generous lace cuffs.

TV 490 1892 Ballgown Bodice outline illustration
To be clear, what I'm planning isn't a ballgown in the Belle Epoque sense. My colors are too dark for a ball gown, and I'm using considerable sleeves.  Being older and not the size of a young lady, this would be recognizable as an "evening" gown in the 1890's; it's still perfectly acceptable for a lady of my stature to wear to a ball. 

TV 292 1893 Bell Skirt outline illustration
We'll be following the basic form of the extant gowns pictured - the skirt and bodice of each of my different forest green silks, the arrangement depending on which I have more yardage of for the skirt. I think that I'll retain the bertha on the pink gown, use the sleeves on the taupe gown, and add generous lace cuffs as in the pink gown. I'm not sure if the sleeves should be solid silk or poufs of lace - or maybe lace overlaying the green silk - but I'm fond of lace. 
Pink 1890's evening gown, a color photo of the extant gown on the left, and a black and white photo on the right of the gown as it was worn by the owner.

The large drapy bows on the pink gown will be replaced by swags of lace caught up with ribbon roses, and possibly over a contrasting faux underskirt as in the taupe gown, depending on available yardage.  I'd like to place large draping bows on the sleeves and embellish with ribbon roses, but I'm frankly not sure how that's going to work with a bertha, so there will be some trial and error. 

The pink gown seems to be worn with a corselet, so I'll be making one of those using TV 492, maybe lace-facing some of the solid green silk. It could match the sleeves. 

I'm having a bit of a challenge finding the lace - this is not the usual JoAnn's fare. I had the perfect stuff picked out only to find that it's out of stock. I scoured Etsy and Ebay for a solution and ended up buying two (and spending far too much money), in the hope that one will show up on time. 

Dress 1893-1894 The John Bright Collection
One piece is 3 yards of an embroidered ivory tulle, both edges bearing V-shaped lace edging so that's 6 yards of "trim". It's coming from China so my hopes are higher than my expectations. (Maybe it eventually becomes trimming for a fancy shirtwaist.) The other piece is 4 yards of a champagne embroidered mesh, edged with scallops and arabesques. It is coming from Los Angeles, so I expect it to arrive this week. 

About dress accessories

Dress accessories will be assembled based on the theme of the event - both a Steampunk and a more historic set for the appropriate venues. A pair of fancy brooches to catch up the bertha in front, one Victorian, one Steampunk. A elaborate Steampunk necklace, or a cascade of pearls. My fancy fan holder will suit for both environs, but I'm looking for a fan that isn't Battenberg lace and isn't white or black. Hair dressing will be a French twist with a high crown, and embellished with flowers, pearls, combs, or feathers. I'll use scrap to make a matching reticule. And perhaps a pair of "green fairy" wings for Steampunk events. 

I'll detail progress in a later blog entry. 

Wednesday, January 25, 2023

Dress Diary: When in doubt, add another petticoat (part 1 - whys, wherefores, and chit-chat)

Way back when - in the Before Times - at least 10 years ago, I started doing Steampunk things and making Steampunk Clothing. Some of those things were (frankly) awful, as is typical of someone who is new to a genre and looking for their style. The thrifted tail coat comes to mind, and then there was the gray ruffled skirt that was way more 1970's than 1880's; not to mention the Asian/Victorian mashup thingy that hasn't aged well in any case. Lately, my taste has turned toward more historical accuracy, dressed up with Steampunk dress accessories, so my attire is now closer to historical examples than in those early days. 

As I got more knowledgeable about Victorian clothing, I started to make some really good pieces. I drafted a Belle Epoch seven gore skirt and on the second iteration decided that it really needed a petticoat to hang properly. My petticoat had a removable ruffled back panel to give more oomph in the back draperies, and gorgeous purple and green floral embroidered ruffle tiers that started their life as a cotton bedskirt. In general it was a very good addition to my Neo-Victorian wardrobe. 

I only speak of it in the past tense because it disappeared somewhere in the Before Times, and since gatherings haven't been a thing for the past three years, I frankly haven't gone looking for it in the pile of boxes filling my storage unit. It seems easier to just make another petticoat. 

Besides, one petticoat isn't enough. 1890's skirts are flared widely at the hem to balance the wide leg-o-mutton sleeves. So, three petticoats, really. Three layers of ruffles; at least two ruffle tiers on each. 

Of course, me being me, this means commencing the project with research

I think that the most significant finding is that there are literally dozens of petticoat designs; they have one common element - flat fronts and fullness in the back. (Okay, maybe that's two common elements depending on how you count it.) The number of gores varies, as does the hem width. Some have rectangular back panels, some are trapezoids. Some have a rising tier of ruffles at about the knee, some have no ruffles on the front panel. Some have interior ruffles. Some have ruches on top of ruffles. 

In other words, build something that works. 

1896 petticoat

The model that I've picked as an exemplar from an 1896 The Delineator magazine has two tiers of horizontal ruffles, one at knee length and one at the hem. The linked blog post has a lot of written detail that is very helpful. 

Of course, I'd cut out the body of this petticoat before I found the linked blog post. 

Based on my skirt pattern, my petticoat is seven gores but without the back fullness; I'll likely reduce the gores to five for subsequent petticoats, based on this exemplar. This set of petticoats will be walking length, and my plan is to make them adjustable to ballgown length through attachment of a removable train. 

"Premium" 90" wide bleached muslin is being used for the petticoats; it's a dense weave and has a crisp hand. 90" wide muslin is about 1.5 times the cost of 45" muslin, and so there's a significant cost savings in buying it wider. The current cost is $6.99/yard. Besides, there's just the luxury of more efficient fabric use with wider widths. The Delineator calls for silk ruching on the bottom ruffle, and I have some lovely faux silk in my stash (picked up on the cheap years ago) that will serve well for this purpose. Far better as trim than as a garment, which is I suppose why it's still in my stash. 

I've long contemplated an adjustable waistband; I don't know how common adjustable waist bands were, but based on the changeable nature of women's waist measurements, I'm guessing that they weren't uncommon. In my research, I've found a period solution - the waistband is a casing, in which a tape is run. The key is that the tape is fixed behind the first or second gores, so the front remains flat and fullness is taken up in the back gores and width. 

When one is wearing multiplicities of petticoats, I'm not sure how having three tapes tied in the same place will work, but since they're on top of the corset, maybe it will be okay.

At this moment, the body of the first petticoat (of three) is started; the body is assembled and the interior seams are flat-felled. I've hemmed about 6 yards of 8" ruffle tiers...

And then I was out of muslin and white thread. 

And then I started doing math. 

So back to the fabric store, where I bought all the 90" "premium" muslin that was on shelf - which still isn't enough for three petticoats. Today I'll start by cutting out a 4" ruffle tier. That tier will be attached per The Delineator, although I'm still pondering about that cording on the top of the tier. It may be there to provide stiffness; it could be there to draw in volume. 

Once that ruffle tier is on, I'll re-measure to determine the width of the bottom ruffle, and post the progress in...

Part 2

Tuesday, January 24, 2023

A flurry of progress, or the Belle Epoque Wardrobe begins to come together

It's taken months - almost a year - since I started working on the Belle Epoque wardrobe, intending to begin building from the bottom. Most of the remainder of the year was occupied with Too Much To Be Done, but I've taken a break for a few weeks, so I'm filling the "time off" with fabric, patterns, and research. 

My concept is to build a small wardrobe of what we called in the 1980's "separates" - tops, bottoms, vests, jackets - that can be mixed and matched for a variety of different outfits that meet sartorial needs for a multi-day event or for a variety of venues. 

Walking Suit from "The "Keystone" Jacket and Dress Cutter: An 1895 Guide to Women's Tailoring"
Furthermore, I'm focused on the Belle Epoque for a couple of reasons. Primarily, the 1890's dress silhouette feels particularly Steampunk to me, likely the effect of Victorian preoccupation with safari and that culture of adventure and exploration. 

However, the last decade of the 19th century was particularly notable for women in the cause of feminism and suffrage, and was the beginnings of modern feminine agency. The New Woman sought radical change to provide opportunities for women independent of their husbands or fathers. Education, business opportunities, and even sport were claimed as a "woman's place" and women's attire reflected these spaces; clothing became more tailored (masculine), and more suited to the activities that women claimed as our own. Sporting attire developed with short skirts or -gasp- trousers as the bicycling craze was claimed by women as healthful exercising, but also a means of transportation independence. 

In short, the 1890's New Woman strongly represents my own belief in feminism and the agency of women. I'll likely be wearing my "VOTES FOR WOMEN" sash from time to time. 

Starting from the skin out, here are the current plans:

  • Corset, from the Red Threaded 1880's pattern, made by a friend of mine (done)
  • Chemise, self drafted from a 1890's published pattern (done)
  • Drawers, self drafted from a 1890's published pattern (done but needing alterations)
  • Corset cover of the chemise fabric leftovers, a lovely broderie anglaise lawn
  • Petticoat, 7 gore, walking length (in process)
  • At least two more petticoats, since 3 seems to be the magic number to achieve the silhouette
  • A divided petticoat from an 1895 pattern
  • Shirtwaist of rust red windowpane printed cotton from Black Snail #0314; antique mother of pearl buttons (in process)
  • Shirtwaist of white textured cotton, Black Snail #0314, similar buttons
  • A collection of neckwear - cravats (done), ties, a lace collar and dickey
  • Walking skirt of deep mustard striped with rust red and brown cotton, self-drafted from a 1890's published pattern (in process)
  • Jacket to match, primarily made of rust red cotton and trimmed in the deep mustard; Truly Victorian's Ripple Jacket pattern
  • Walking suit of beige and taupe striped cotton
  • Sporting bloomers of brown and black striped linen from Laughing Moon #110 to go with my basque (done) from the same pattern
  • A couple of sporting-length skirts
  • At least one vest, but probably two; Black Snail #0220
  • Corselets of a yet-to-be-determined fabric and color (Truly Victorian #492), using buttons as a decorative motif
  • Hats, gloves, shoes
That's a lot, but it should make for a variety wardrobe that will meet the needs of most events. (We'll have to talk about evening wear in another post.)

The good news is that some of the above is well under way. The corset and chemise are done; the first petticoat is in process as is the mustard striped walking skirt. The mockup is done for my first shirtwaist, the windowpane check, and the buttons for it are on order. I have a small collection of cravats already; the first hat form has arrived and is ready to trim. 

The bad news is that the sporting basque - heretofore one of my best pieces - is now too small and I need to drop some pounds to wear it again. Also, my red and taupe striped skirt. Hopefully in the next few months. 

The other good news is that I have been in the habit of picking up suitable fabrics when they cross my path on the cheap racks and I have a good collection - the mustard cotton and the beige and taupe cotton are two of those. I was able to get the rust red windowpane check similarly recently. I still have plenty of yardage in my stash; silk for vests and neckwear, the linen for cycling bloomers. Thankfully, 90" wide cotton muslin has been on sale at $6.66/yard. However, I'm finding that I'm spending an inordinate amount of money on the rest of the bits and bobs. I've ordered lace, buttons, broiderie anglaise lawn, patterns, hat blanks, corsetry supplies - mostly from Etsy and some at very reasonable prices. 

The goal is to have two full outfits done by WhimsyCon, the local late March Steampunk/Costuming convention. That's corset, chemise, three petticoats, corset cover  - and then a walking outfit (shirtwaist and neckwear, corselet, skirt) and ballgown (bodice, skirt). I've got Steampunk dress accessories galore, and a couple still arriving. 

I'll start posting regular updates of progress and maybe even some photos, so return regularly to see what I'm up to.